

Are you struggling to track email campaign entries and exit in Eloqua? If so, this blog is for you!
Knowing who entered and exited a campaign can be extremely beneficial information. When you need to troubleshoot a campaign, understand why a contact received a specific email, or strategically track a contact's journey through nurture programs, tracking entries and exits is the way forward. The problem is, Eloqua doesn’t help you out much when determining which contacts entered and exited a campaign, and when they did so.
You can go to the campaign, click the Reports icon on the upper right, and choose the Entry Report or Exit Report:
But, there’s a catch. If you need data that’s more than three months old, you’re out of luck – three months is as far back as these operational reports go. In addition, if your campaign is high-volume, it can be very slow to retrieve contacts and select the desired period t within the three-month limitation.
What can you do? Planning ahead is the best way to effectively manage your reporting and troubleshooting. When you set up a campaign, add steps to record entry and exit data to a dedicated CDO (custom data object). The Tegrita Write to CDO cloud app action step gives you a tool you can use to create a comprehensive record of entries and exits.
Ready to learn more? Here’s how to do it:
Create the CDO
The first step is to create the CDO. If you're unfamiliar with a CDO, it is a custom table you define within Eloqua to store data as needed. A CDO can contain up to 1,024 fields and can have up to 5 million records. That gives you plenty of wiggle room for your data requirements!
To track entries and exits from a campaign, we recommend creating a CDO with the following four fields:
- Email Address
- Campaign Name
- Description
- Timestamp
With these four fields, you can easily record every entry and exit from a campaign, even for contacts who have exited and re-entered more than once.
Once you have created the above fields, you can go ahead and create your CDO:
- Go to the Contact menu in the upper right-hand corner and choose Custom Objects.
- Click New Custom Object in the middle of the screen. Give the CDO a name, add a description, and choose a folder to store the CDO in. Leave the Entity Type set to Contacts and the Entity Field as Email Address. Click Next in the lower right-hand corner.
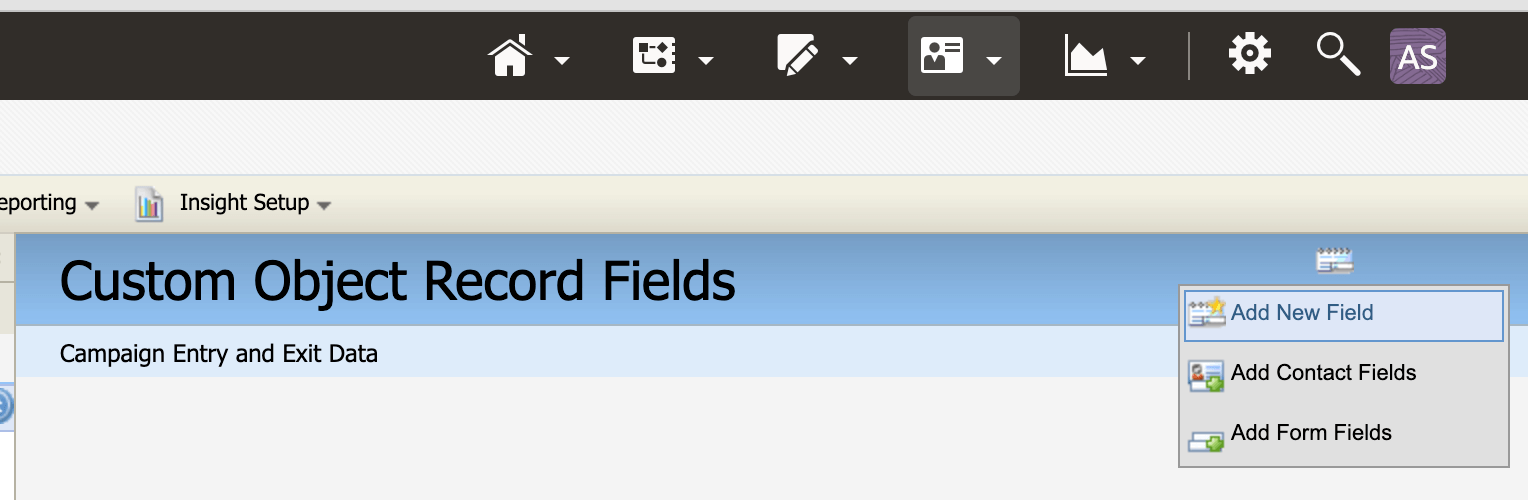
- After completing the above step, you will see the Custom Object Record Fields screen appear. Click Custom Object Record Fields > Add New Field.

- Next, the Custom Object Record Field screen will appear. You can define the Email Address, Campaign Name, Description, and Timestamp fields here. The first three fields are configured with a Data Type set equal to "Text" and the last field to "Date/Time."
Click Next twice to get to the Custom Object screen: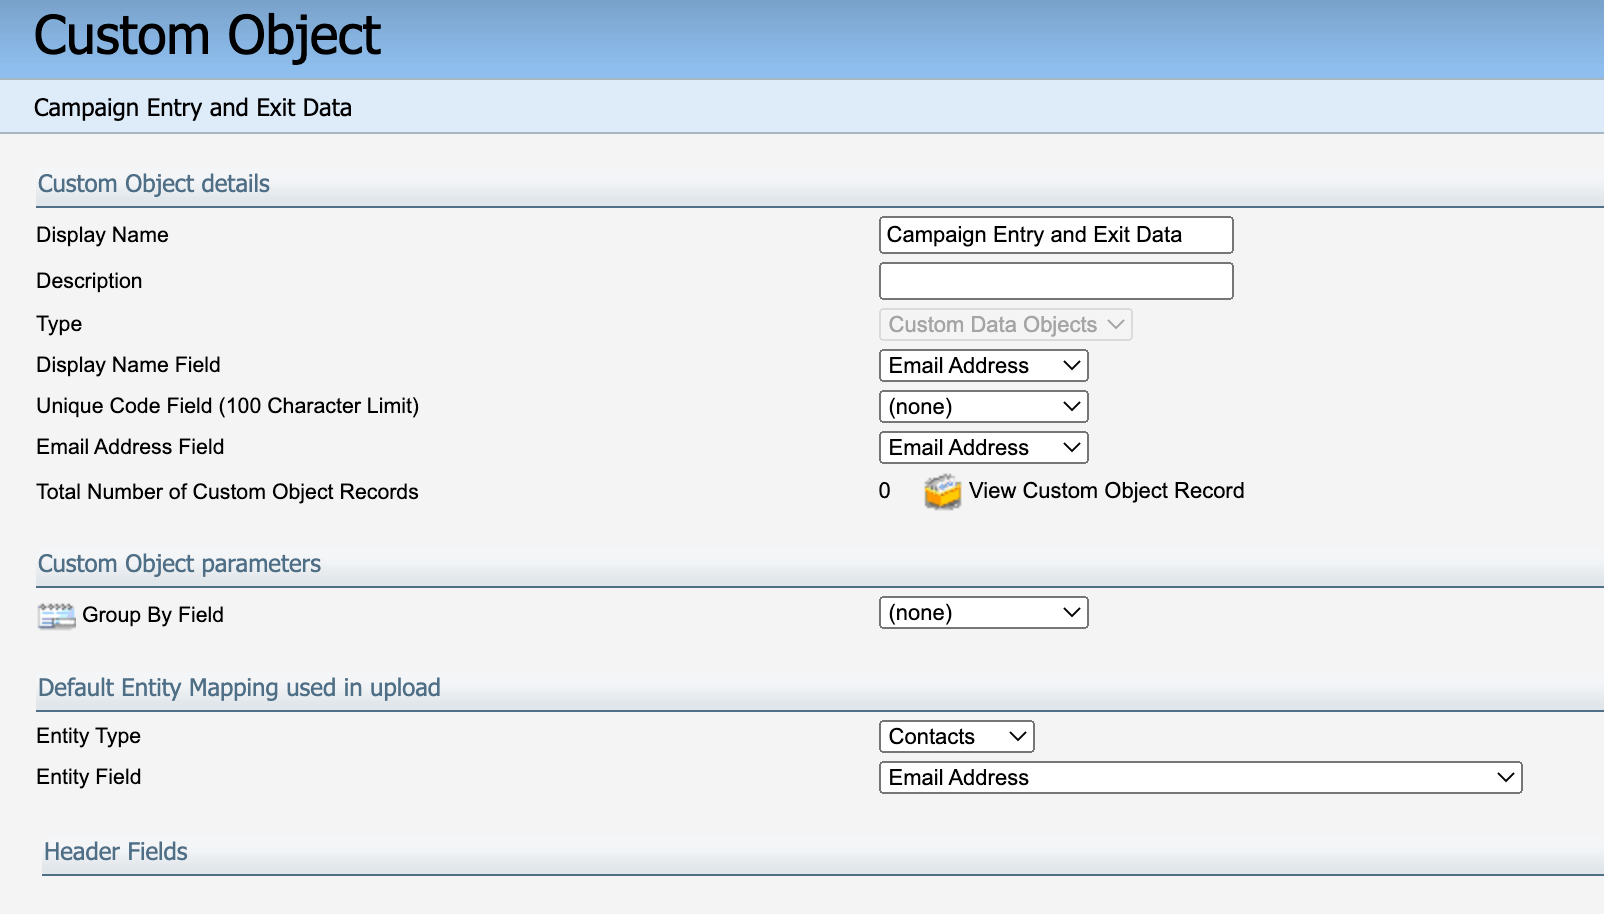
Set Display Name Field and Email Address Field to “Email Address,” but leave the Unique Code Field blank. This lets you track multiple entries and exits from one or more campaigns for the same contact.
Add Campaign Canvas Steps
The above steps complete setting up the CDO to store entries and exits from campaigns. The remaining process includes adding steps to each campaign canvas to record entries and exits. Using the Tegrita "Write to Custom Object" cloud app is the easiest way to do this.
First, ensure you've installed the Write to Custom Object app. You can find general instructions for installing and using the app here. Once you have completed this step, follow the instructions below for using the cloud app to record campaign entries and exits.
Go to the campaign where you'd like to record, and identify all the entry and exit points. Remember less-common exit paths like error handling. Next, you'll add a cloud app step after each entry point and before each exit point.
To add a cloud app step after an entry point, do the following:
- Locate the Campaign Steps > Action Steps toolbar on the left, and select the Write to Custom Object action. You’ll find it near the bottom of the Action Steps section, after the standard steps that come with Eloqua.
- Add the step just after the entry point (this is typically a segment step or a potential feeder). Connect the entry point to the cloud app step. Next, you will need to connect the cloud app to the previous entry point.
- To open the cloud app, double-click it.
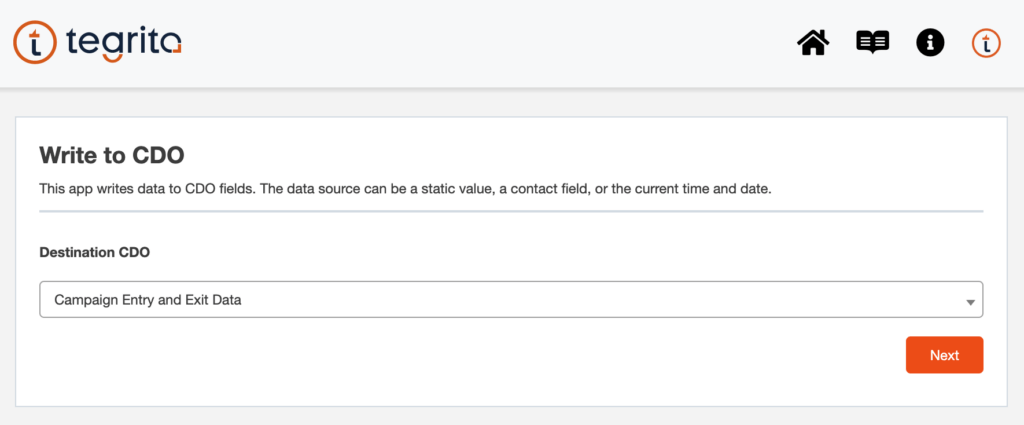
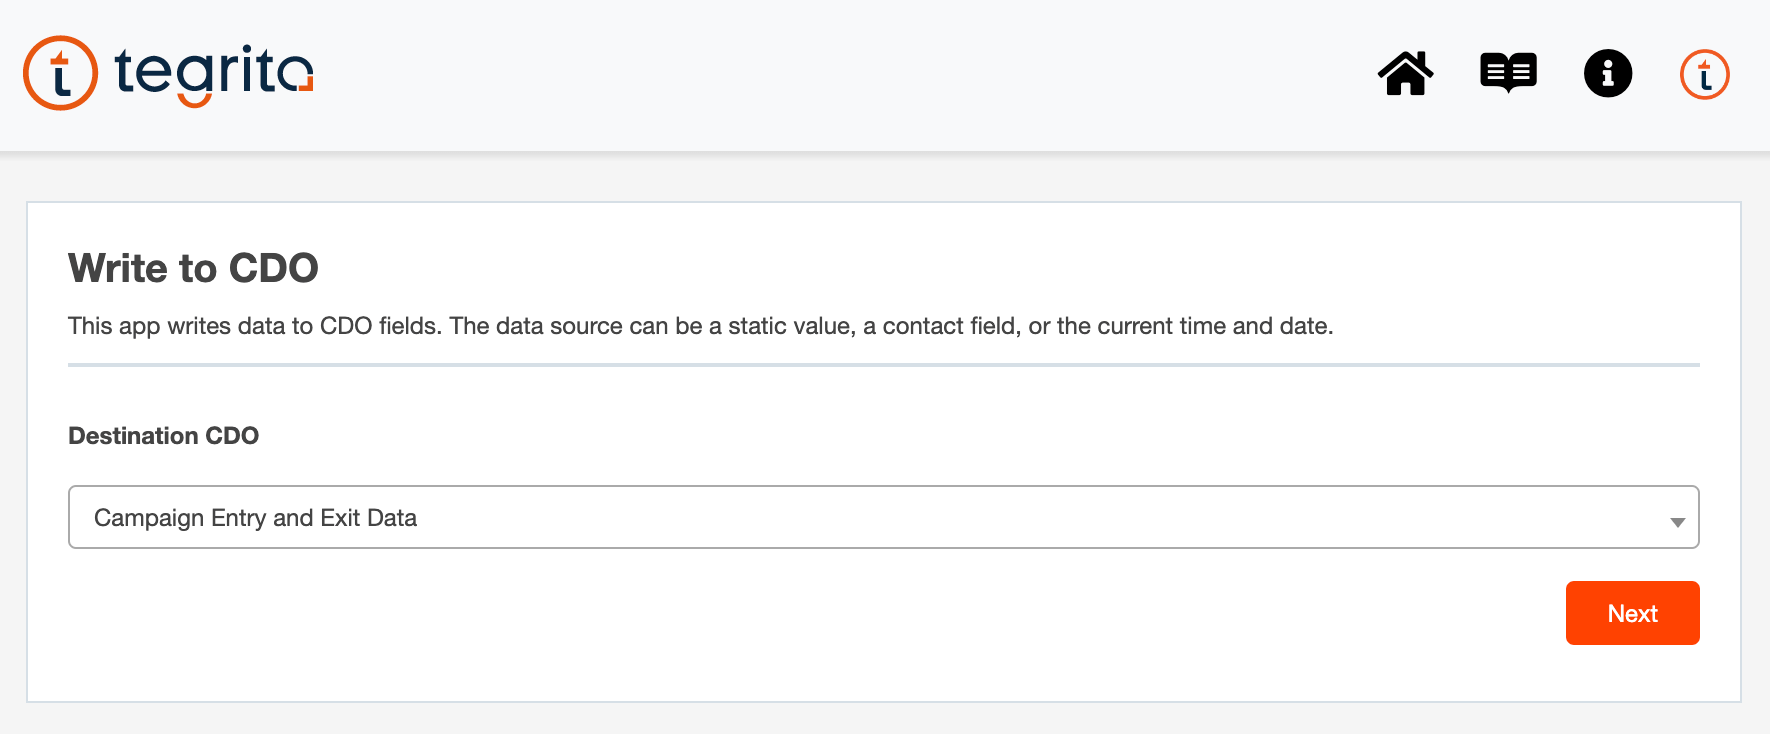
- In the first screen that appears, choose the Custom Object you created above, then click Next:
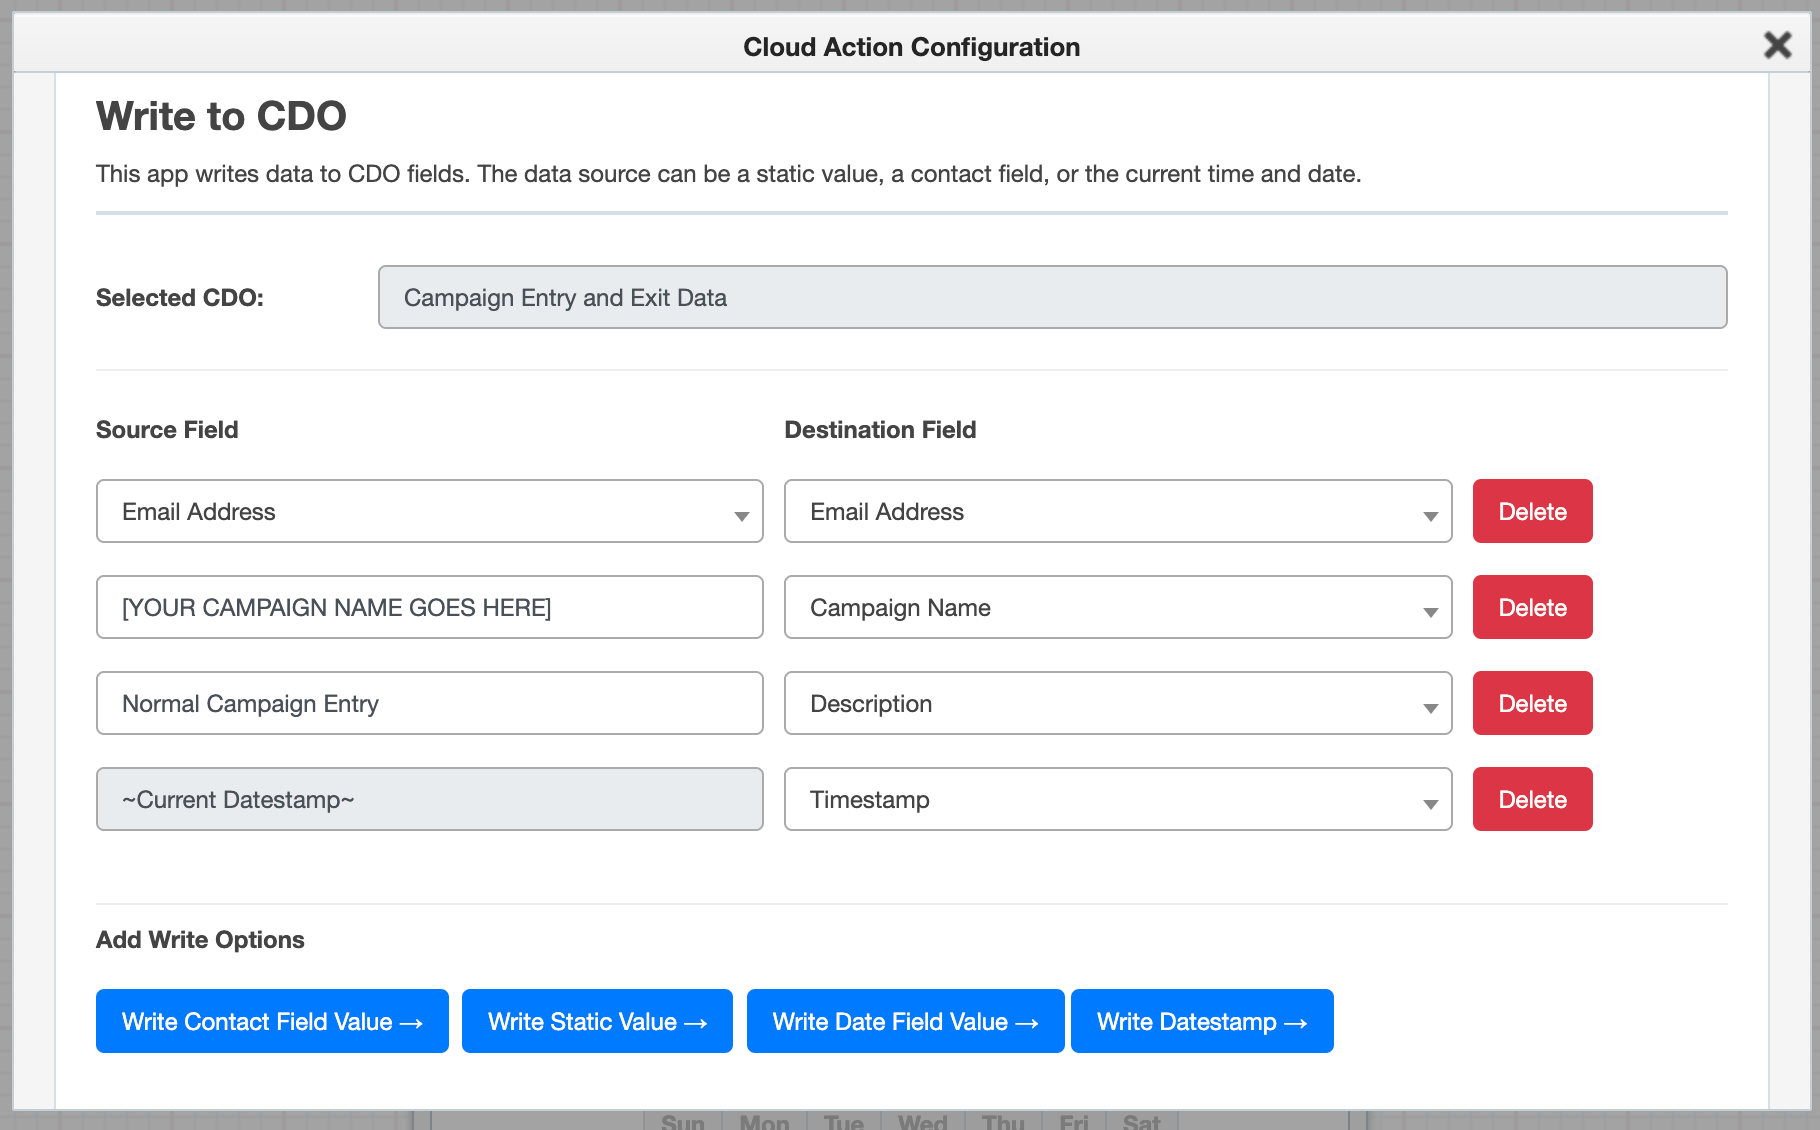
- The next screen lets you set up the CDO data. You will need to configure this step as illustrated below:
- Click the blue Write Contact Field Value button and choose “Email Address” as the Source Field. Choose “Email Address” in the Destination Field pop-up on the right. Click the Write Static Value button and enter the campaign name in the Source Field column. Choose “Campaign Name” in the Destination Field pop-up on the right.
- Click the Write Static Value button and enter a description of the entry point in the Source Field column. Choose “Description” in the Destination Field pop-up on the right.
- Click the Write Datestamp button and then choose “Timestamp” in the Destination Field pop-up on the right.
- Click the Save button on the lower right-hand side.
Upon completion, your screen should appear like this:
To close the cloud app configuration screen, click the “X” on the upper right-hand corner.
Repeat the process for every exit point on the canvas, adding an appropriate description like “Normal exit” or “Error on email step.”
Hooray, you’re all done!
You’ve now set up a process to record every entry and exit from your campaign canvas. To retrieve the data, go to the CDO and choose Custom Objects Record Data from the Reporting menu at upper right. Then choose Export > Export to Excel to send data to an Excel file.
If you use this CDO extensively, or if you use it on busy campaigns, you may want to only export some of the records. An easy way to get the records for one specific campaign is to use the Custom Object Record Field Values option in the CDO Reporting menu.
Choose this option from the Reporting menu, then choose Campaign Name as the field for displaying values. Click Select. This will bring up a screen showing all the campaign name values in the CDO and their counts. Click on a particular campaign name to view all the records with that campaign name. You can then choose Export > Export to Excel to create a file with just the records for the campaign you selected.
We hope you have enjoyed learning about the effectiveness of The Tegrita Write to CDO cloud app to create an effective record of entries and exits for all your campaigns. We’re confident that you will find this app invaluable when you need to trace individual contact records through a campaign, for troubleshooting tasks, and for higher-level strategic contact tracking. From all the Tegrita Team, we wish you the best of luck in your future campaigns! If you have any questions about our CDO cloud app or any other queries, please contact us here.


