

Introduction
Looking to add that all important, personalized touch to your email campaigns? Eloqua’s signature rule provides an effective solution. Keep reading to discover how you can up your email game with Eloqua.
Generic Vs. Personalized Email Addresses: Which Option Wins?
Let’s picture the scene: you open your inbox on a Monday morning. You are overwhelmed by the number of emails that have flooded in, and needless to say, you want to focus on prioritizing the most important ones. At the top of your mailbox, there are two emails. The first email is from a company contact that you know and trust, and the second email is from a generic company email address that you are not familiar with. Which email is most likely to grab your attention? If your answer is the company contact option, you along with the majority of email openers - fall into this category. There’s even data to back this up: according to PinPointe’s split testing, you will generally see better results by using a specific contact person vs. a general address like ‘support@’ or ‘sales@’, or just using your company name. This is because your recipients take only a second or two to decide whether or not to open your email. If they do not recognize your company, they are likely to skip over the email. Also, general addresses are less personal, which reduces open rates. PinPointe's analysis found that using a specific personal name vs. a general email address as the send-from address can improve the net open rate by 15% – 35%. Personalize your emails with Eloqua and see your open rates skyrocket. Let’s breakdown the process of how it works:
Personalize Your Emails with Oracle Eloqua’s Signature Rules
With Eloqua’s signature rule feature, you can easily configure your emails to send on behalf of your sales or account team.
Signature rules allow you to configure an email campaign so that the sender of an email is determined by the data that you select. As we have already outlined above, email personalization provides added value to open rates. Additionally, there are a number of situations in which personalized also drives value. Let’s say that a new sales manager is coming on board and is gradually building up their accounts. A personal email from the previous sales manager introducing the new manager can help bridge their relationship with existing clients. Or perhaps a company exec is visiting an area and wants to schedule 1:1 meetings with top clients. Or an event is coming up that is targeted to a very specific audience. For these specific instances, an email sent from a known, trusted resource is much more likely to be opened and responded to than one sent from a generic corporate address.
Curious to learn more? Let’s walk you through how signature rules work:
There are three things that need to be in place before you can start to use this Eloqua feature:
- Data: You will need data that you can use to determine which sender to use for each contact. The simplest case is when you have an Account Manager or Salesperson field to work from. Another example would be Country or State or Province, where each location has a different salesperson associated with it.
- Mapping of data to senders: You need to understand exactly how the data field drives the selection of a sender. This information should be structured as value-sender pairs, as shown below. It’s possible to have more than one value that maps to the same sender, as seen in the example below: Region ValueSenderEastMaria HensonWestJose RoblesSouthBrian WilsonCentralNate PeoplesNorthJose Robles
- Eloqua Users: Every sender must have an Eloqua user created for them. The Eloqua user does not need to be enabled (if the person doesn’t need to log in to Eloqua) but the Eloqua user does need to exist.
Here are step-by-step instructions for setting up, testing, and activating your Signature Rule.
Create the Signature Rule in a Spreadsheet
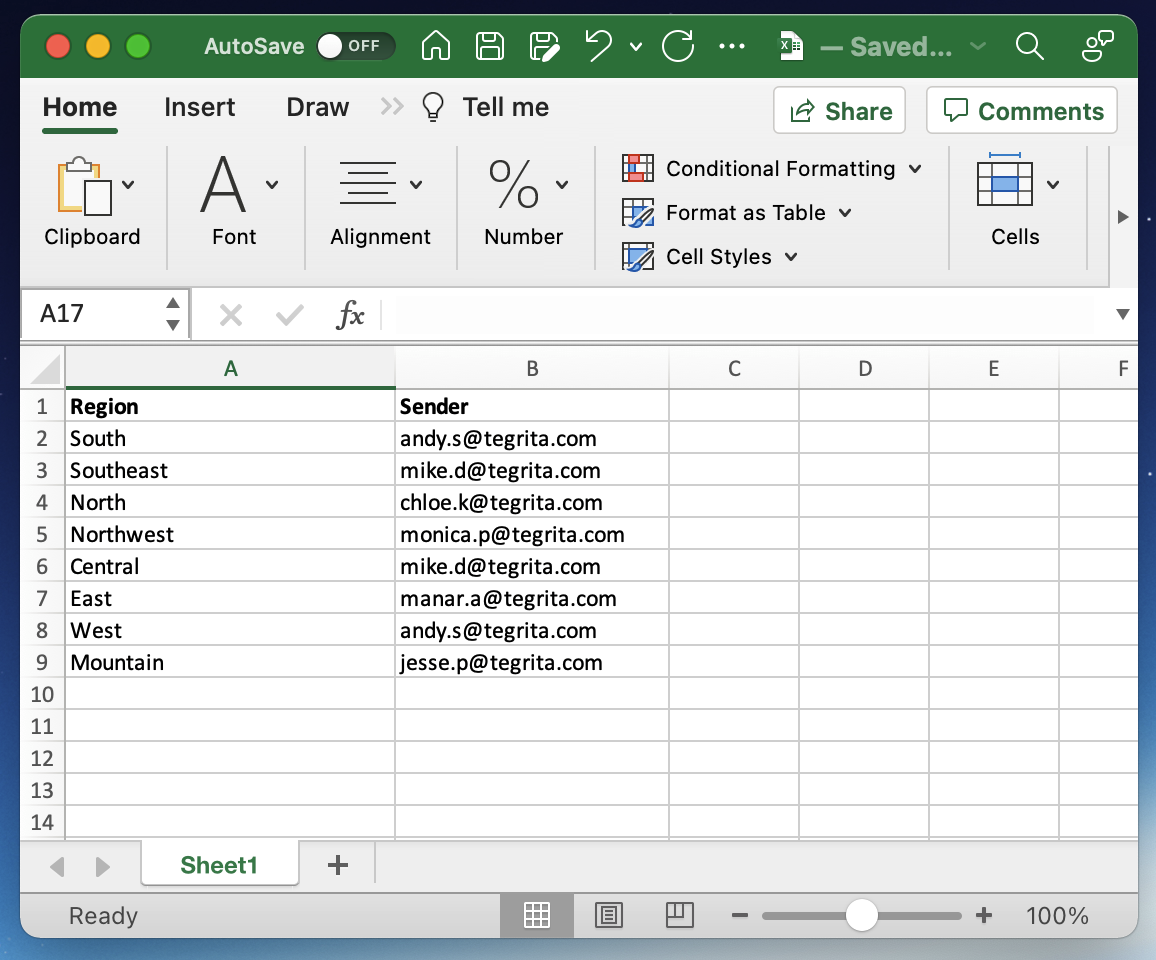
Using Excel or another worksheet tool, create a spreadsheet that maps data field values to email addresses for the people you will be designating as senders. If the Eloqua user doesn’t exist yet, don’t worry - we’ll create the users in the next step.
The spreadsheet will look something like this:
Create Users
Review the list of senders in your table, and make sure that they all have Eloqua user IDs in place. If any of the senders do not have an Eloqua user associated with them, create it now. (See the Eloqua documentation for more information on how to create users.) If you do not have the appropriate permissions to create new users, you may need to ask your Eloqua administrator to create the users.
Create the Signature Rule
Once you’ve documented how data will be used to map to senders, and you’ve made sure that all the senders have Eloqua users, you can create your Signature Rule.
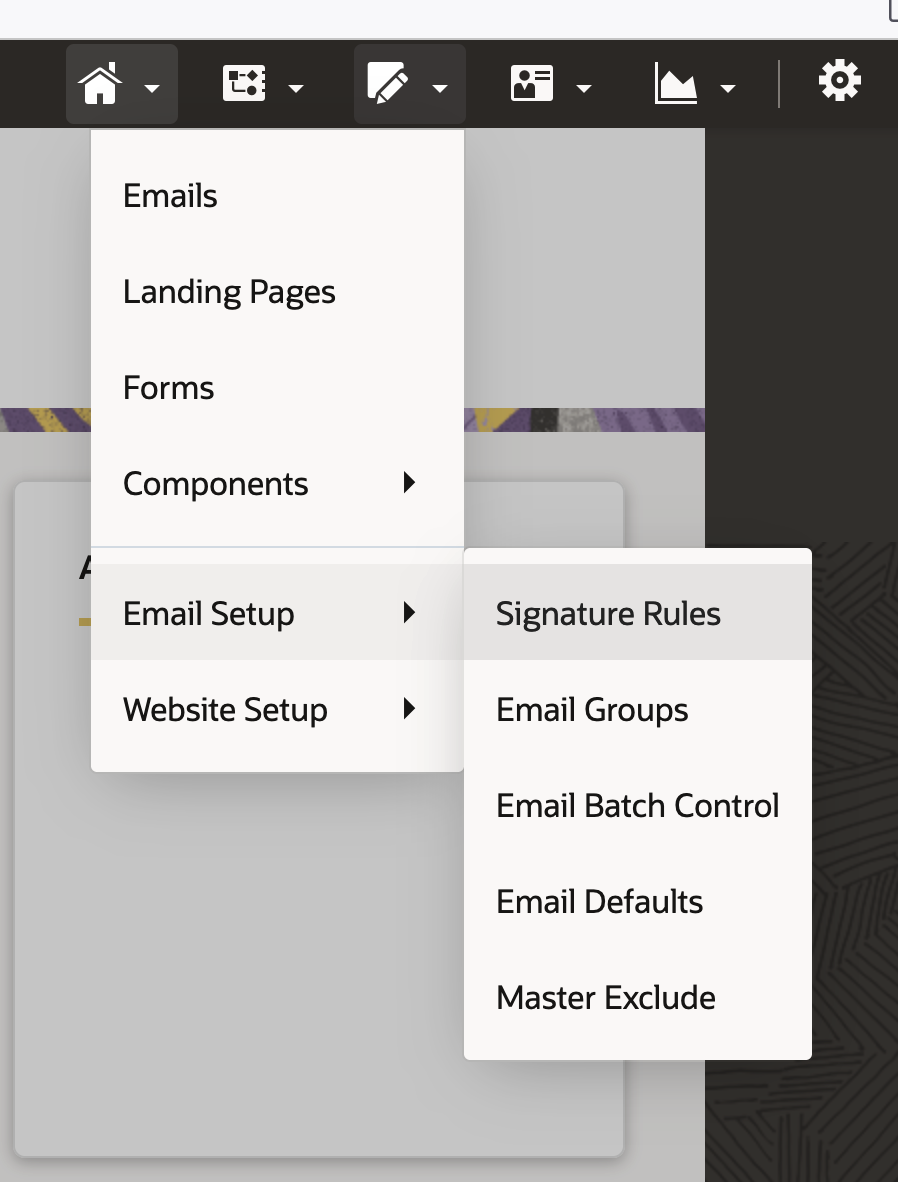
First, choose Email Setup > Signature Rules from the Asset menu on the upper right-hand corner:
We’ll create a new Signature Rule from scratch. If you are updating an existing Signature Rule, you can skip this section. Click New at upper right to create a new rule. The resulting dialog looks like the following:
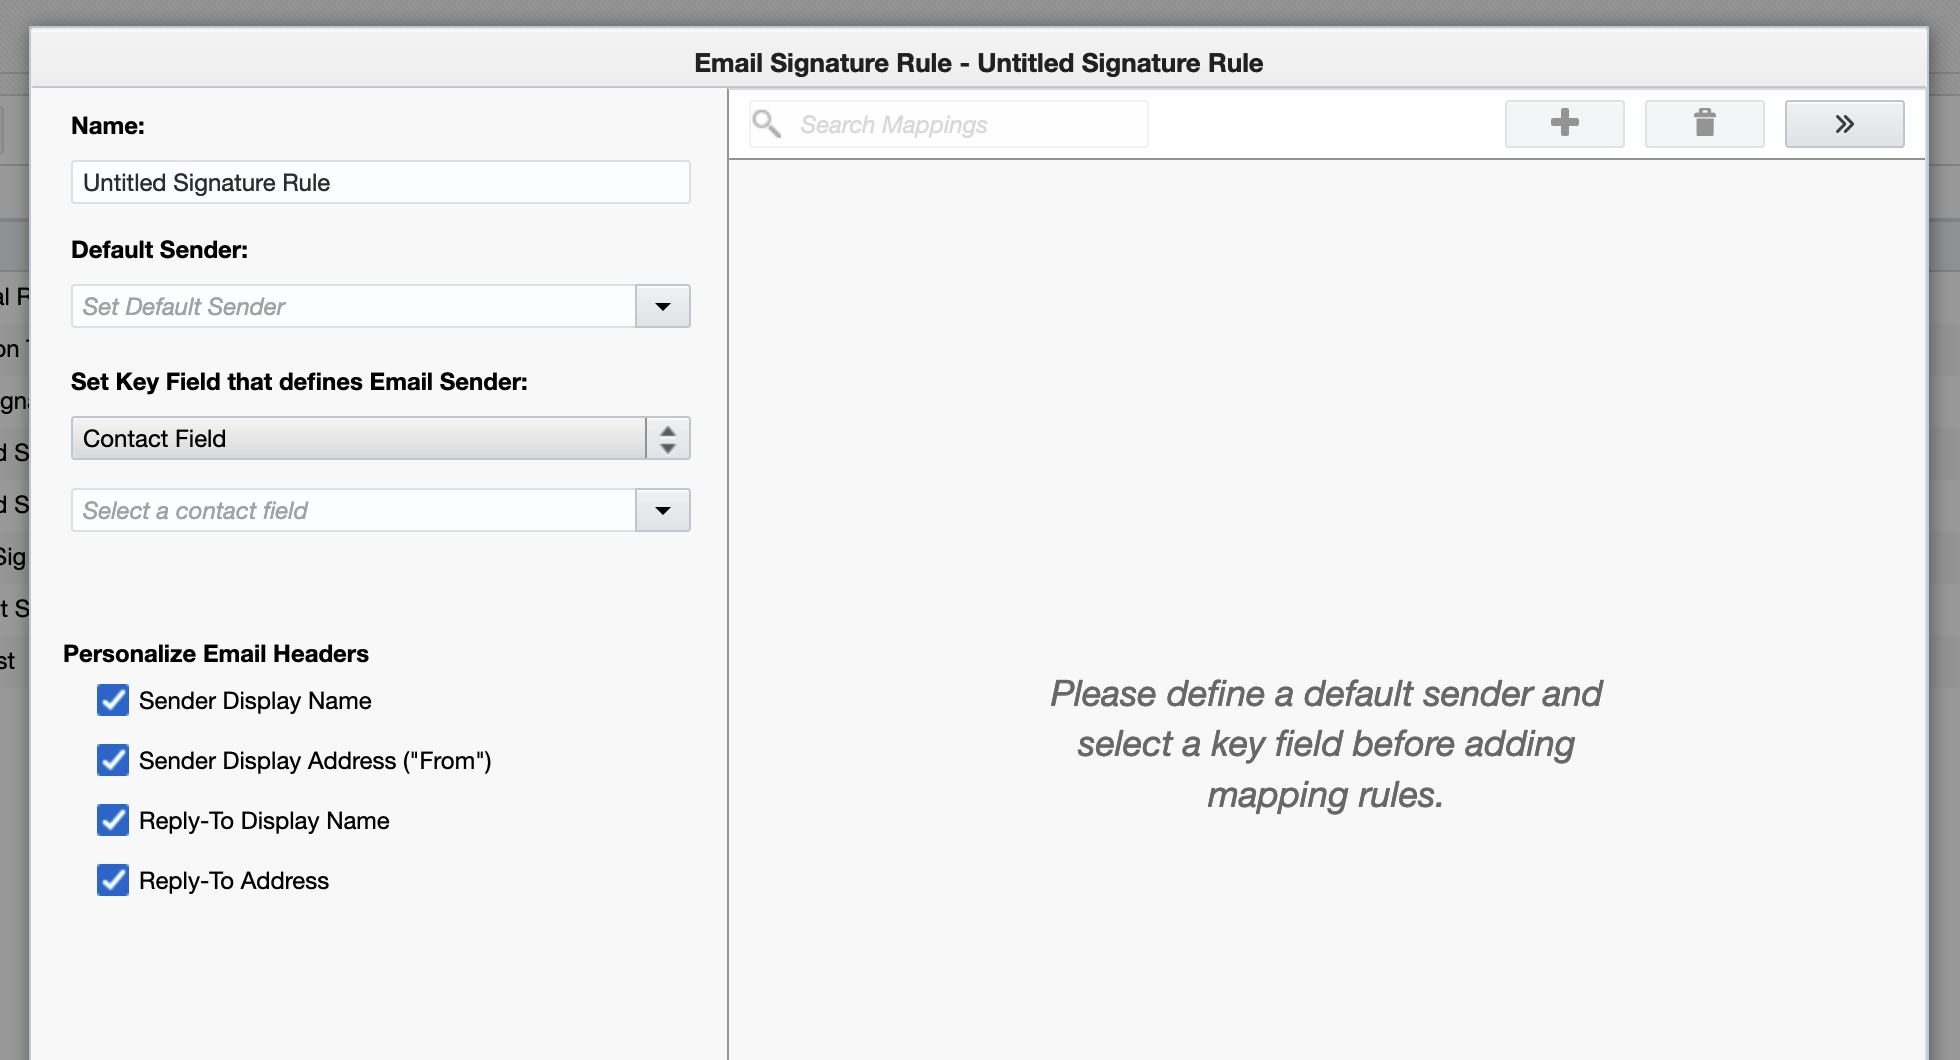
To create the rule, follow these steps:
- Give the rule a name that will distinguish it from other Signature Rules.
- Choose the Default Sender by selecting from the Default Sender pop-up menu. This sender will be used if recipient data does not match an entry in the Signature rule table.
- Choose the Key Field to determine which Sender to use. For our example, we’ll choose Region.
- Configure the Email Header fields. You can independently choose whether to apply the Sender information to the following header fields:
- Sender Display Name
- Sender Display Address (“From”)
- Reply-To Display Name
- Reply-To Address
- Next define the mappings:
Individual mapping rows can be added by clicking on the plus sign at the upper right-hand side. After this step, double-click Field Value to enter a data value, and Email Sender to choose a user. If you have multiple mappings, it makes more sense to upload them from the spreadsheet file that you created earlier. To do this, click the double-carat at the upper right-hand corner to show the Signature Rule menu, and choose Upload Mappings:
- Select the spreadsheet file you created earlier, review the data, then click Next Step to view the mapping screen:

Map the Region field to the Field Value, and Sender to the Email Sender, as shown above. Then click Next Step to review and finalize. Click Finish in the next screen to upload your table of mappings.
- Review the results in the Signature Rule screen and take a look at the Signature Mapping results email that was sent by Eloqua to make sure that no mappings were missed.
If you are updating an existing Signature Rule, review the mappings that have been set up in the rule and compare them to your spreadsheet. If any are missing or have changed, update them in the rule.
Test the Signature Rule
Testing your work is a necessary precursor prior to sending out your email campaign. Before using the new Signature Rule in a live campaign, you should create test records and a test campaign to verify that the rule works as intended, using the following steps:
- Create a set of test records that you can use to verify the mappings.
- Make sure that you and your team have access to monitor the selected email addresses.
- Edit the test records so that each record exercises a different row in the Signature Rule table. If appropriate, add an extra configured in the signature rule.
- Create a test segment with the records and add it to a new test campaign.
- Make sure that the email is configured to use your Signature Rule (see the next section for instructions) and run the test records through the email step.
- Verify that the emails have been sent from the correct senders based on the data value that you used in your Signature Rule.
Use the Signature Rule in your Live Campaign
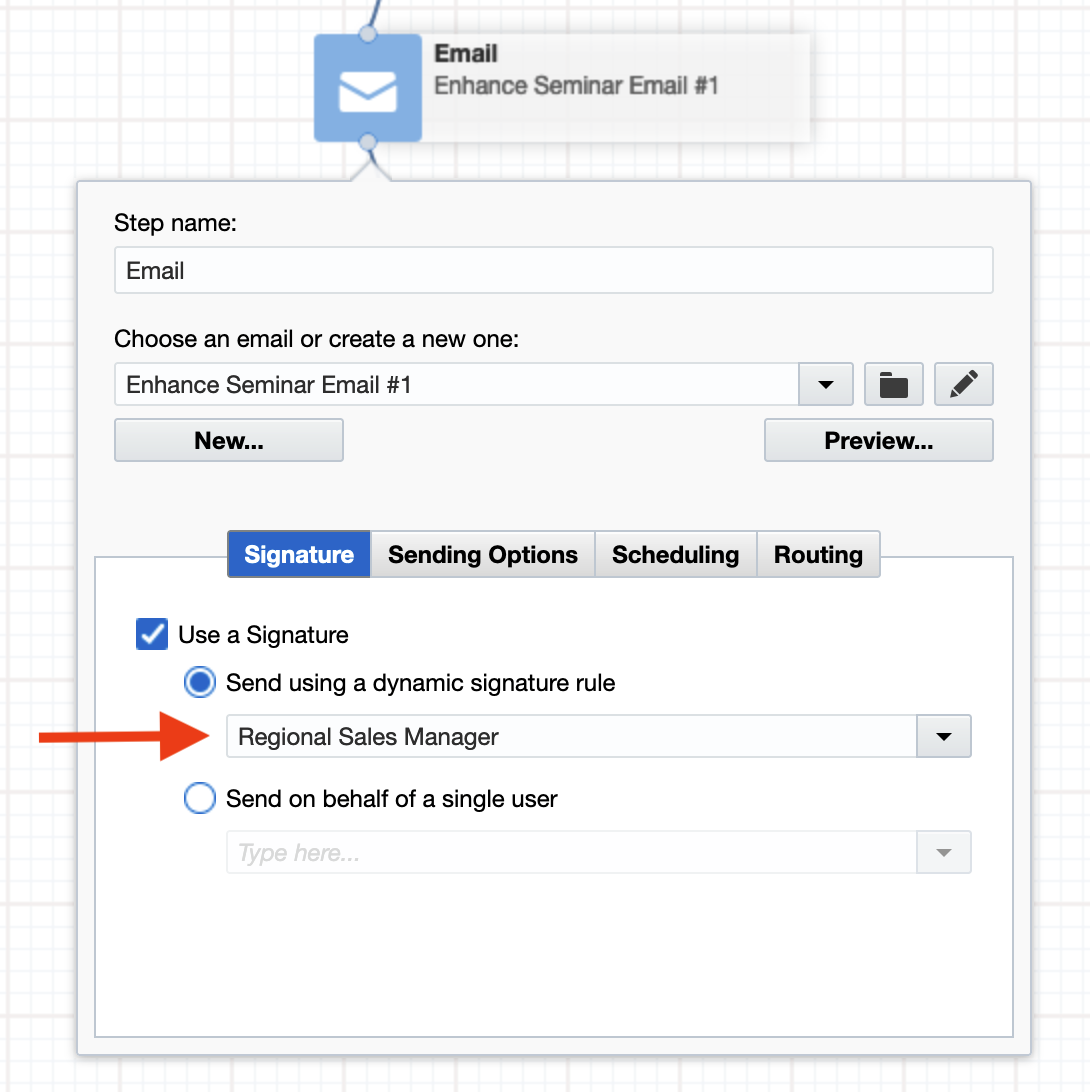
To use the Signature Rule in a live campaign you’ll need to configure the email step to use your rule. Double-click the email on the canvas and make sure the Signature tab is highlighted. After this is complete, check the Use a Signature checkbox and click the Send using a dynamic signature rule radio button before selecting your signature rule from the popup list of rules.
And, voila! There you have it. Personalized and more effective email campaigns that can be set-up with ease. Remember, your email personalization efforts will pay off in the long run - whether you are looking to build relationships, expand your contacts, or improve your email open rate - Eloqua has your back. We hope you have enjoyed learning about the signature rule process. If you have already tried it, we would love to hear from you! Let us know how it went or if you have any questions. We are happy to help!
About the Author
More Content by Andy Shaw


![B2B Tech Marketing Talks [#13: Automating B2B Tech Marketing w/ Brandi Starr]](https://content.cdntwrk.com/mediaproxy?url=https%3A%2F%2Fi.ytimg.com%2Fvi%2F66Iwhp_pZIk%2Fhqdefault.jpg&size=1&version=1727978132&sig=f2dd56398e843516c21a74fb039cfb68&default=hubs%2Ftilebg-videos.jpg)


